In our previous tutorial, we discussed setting up Gnome Boxes for Windows 11 installation with TPM and UEFI support. In this tutorial, we will focus on increasing the VM storage size for an existing VM. It is worth noting that I am using version 43.3, and I will update this tutorial for the next release. For the purpose this tutorial, I will use Windows 11 VM on Arch Linux Machine.
Although Gnome Boxes has utilities for changing the storage limit, it does not affect anything when I try to apply it to an existing VM. However, there is a little trick that you can use to increase the storage size. To begin, you need to clone the VM by right-clicking and selecting Clone. The cloning process will start. I’m not sure why we have to do this, but it’s work.
After cloning process completed, we have a new VM with the same configuration as the existing VM. Click Properties and change the storage limit.
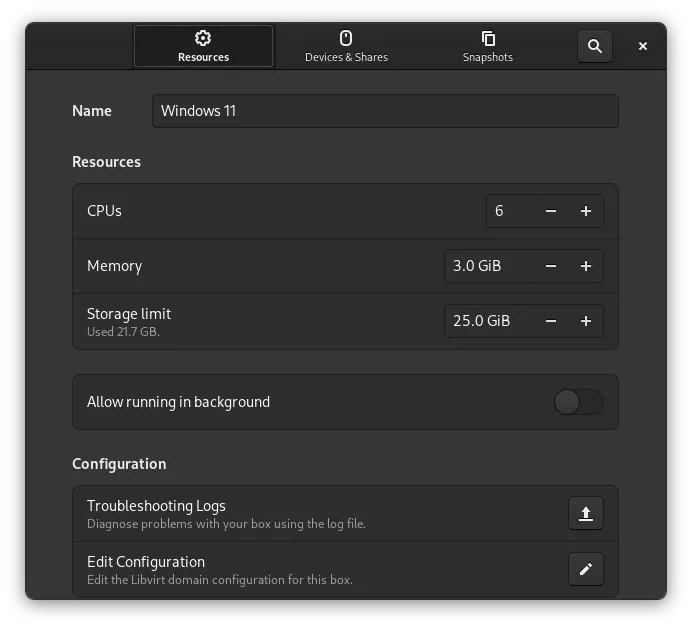
In my case, I am increasing the storage limit from 25GB to 30GB. (Note that I am using a super minimalist Windows 11 configuration that can run on just 2GB RAM and 25GB storage).
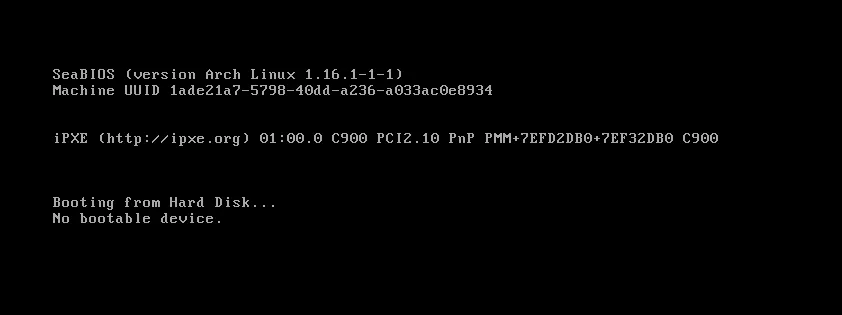
Once you have changed the storage limit, try running the VM. If you encounter an error like this, simply go back and force shutdown the VM. This error usually occurs when we are using Legacy BIOS instead of UEFI, which means we need to edit the configuration files. If you do not face this issue, you can proceed to the next step.
Right click on VM and select Properties, and go to Edit Configuration. Find <os>...</os> tag and add this line
<os>
...
<loader readonly="yes" secure="yes" type="pflash">/usr/share/edk2/x64/OVMF_CODE.secboot.4m.fd</loader>
...
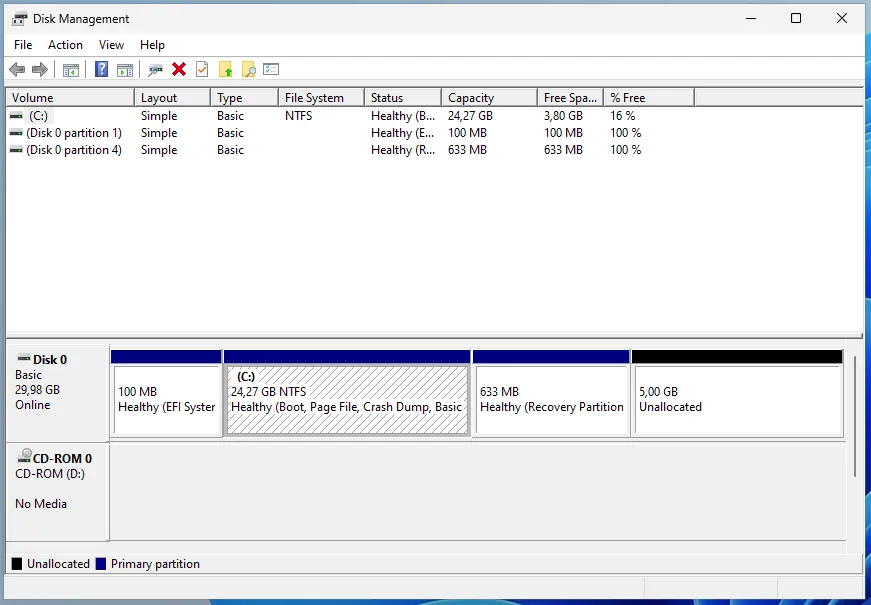
</os>Save the changes and try running the VM again. This time, the VM should be running in UEFI BIOS mode. Once the boot process is complete, go to the disk manager. In Windows, you can open Create and Format Hard Disk Partitions. Notice that there is a new unallocated space (in my case, it’s 5GB). We will now use that space to increase the C partition.
Now we have another problems to solve before we can extend the storage size. See, the unallocated space is in the right side of the C Partition after the Recovery Partition. We cannot extend the C Partition from unallocated space. To move the unallocated space in between the C partition and the recovery partition, we need another tool. While paid software like Easeus can do this, I will use GParted instead.
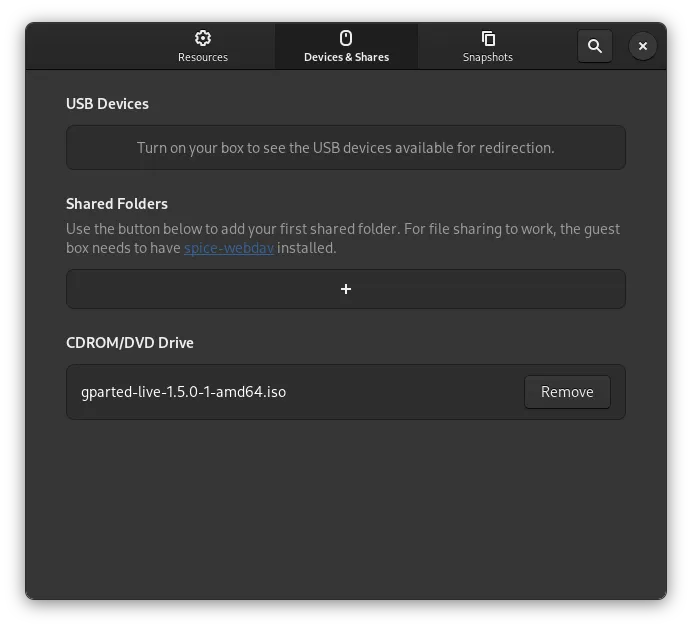
You can download GParted Live CD ISO from the official website. To get started, shut down your VM and open the Properties menu. Then, go to the “Device & Shares” tab and add the GParted Live CD to the CDROM/DVD drive.
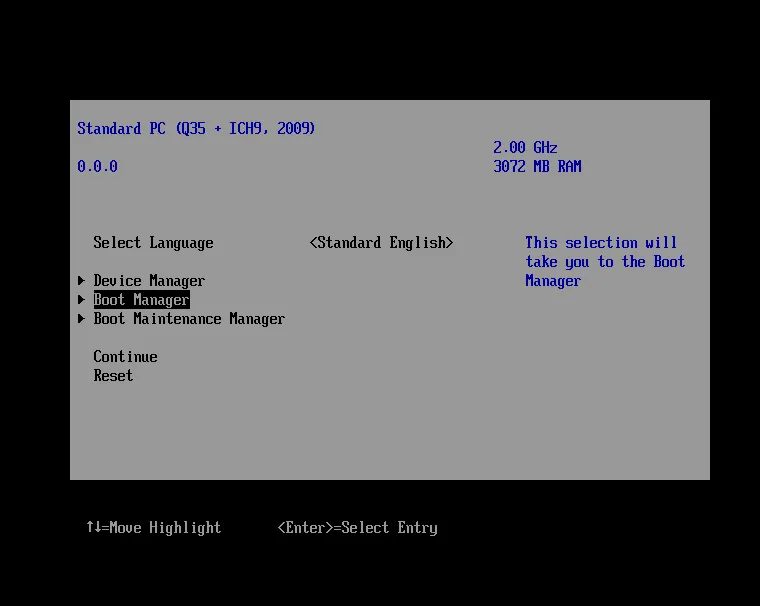
Now, let’s run the VM again, but before we boot into Windows 11. Press F2 to enter BIOS Menu. From there, boot to GParted ISO from DVD-ROM.
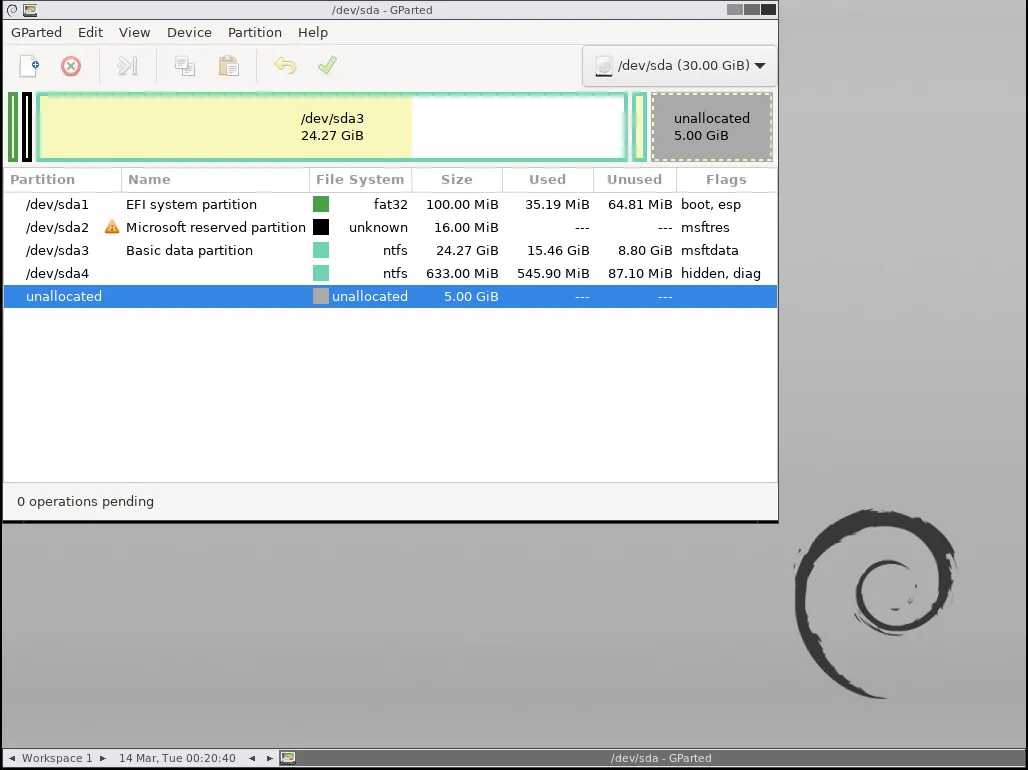
We have boot to Gparted Live CD, and we can see the drive we will extend and the unallocated space.
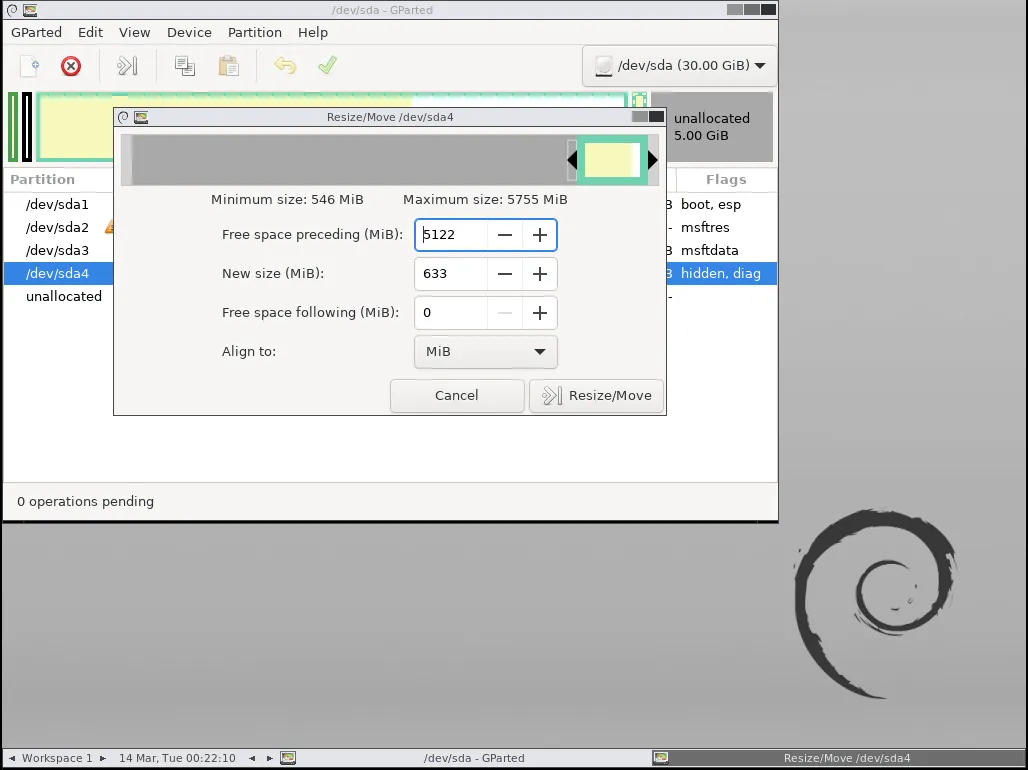
Let’s start from moving the Recovery Partition to the end of partition table. Right click the partition, select Rezie/Move and drag it to the end of the partition table.
Next, extend the C partition to include all of the unallocated space. Right-click on the C partition and select “Resize/Move”. Then, drag the partition to the end of the unallocated space.
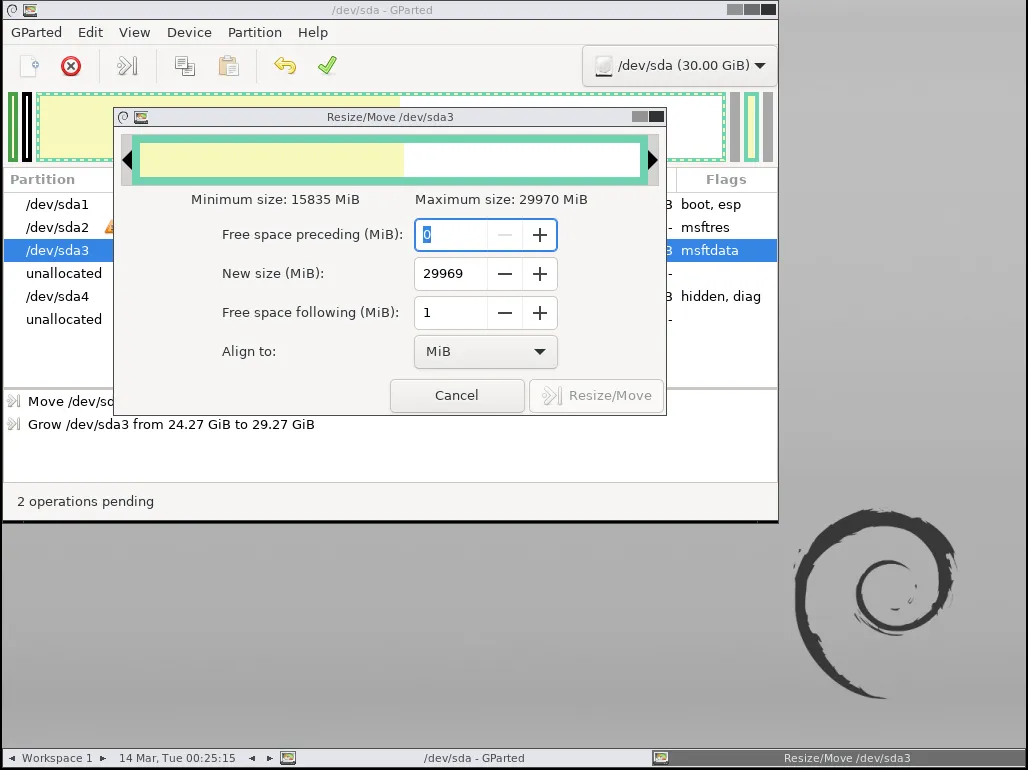
Once we have done move and increase the C partition, click “Apply” to start the partition resizing process, and wait for gparted to process the task.
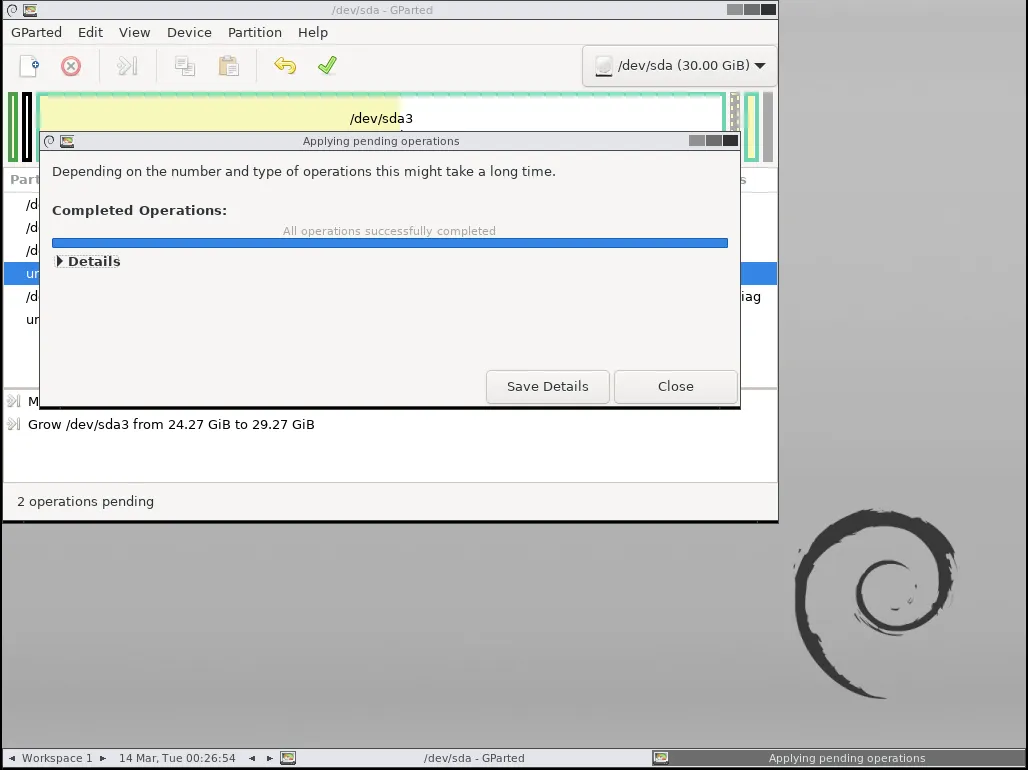
Shutdown the GParted Live CD, remove the Iso from CD-ROM/DVD Drive, and Boot to Windows. Voilaa!! C Partition now has been extended to 30GB from 25GB.
