OpenGraph images are used to enhance the appearance and shareability of website content when shared on social media platforms, like twitter, facebook, etc. OpenGraph images serve as a thumbnail of the website link that provides users with an idea of what the link is about before they click on it. It is possible to use any image as an OpenGraph image, and in some cases, it can even be generated automatically from the page’s content.
Astro is fantasitic framework for building ‘low interaction’ website such as blog, news, and more. Astro comes with many integration to frontend library, like react, preact, vue, solid, svelte, and more. I write this blog with astro, and it is easy and fast. One important aspect of creating blog content is ensuring that it is shareable on social media platforms. This is where OpenGraph images come into play. I have generated OpenGraph images for any pages in this blog. I am using Satori from Vercel to generete opengraph images base on the content of the page. Satori is library to convert HTML and CSS to SVG. Combined with astro routing, we can generate OpenGraph images as much as we want.
To get started, we need to install two npm packages, satori and sharp to our astro project
npm install -D satori sharpIn order to store all of our OpenGraph images, we will be using a route called /open-graph/[...slug].png. For example, if we have a page located at /blog/lorem-ipsum, then the OpenGraph image for that page will be located at /open-graph/blog/lorem-ipsum.png. Opengraph images will be in png format, as Twitter does not support svg format for opengraph images. Satori will generate our images in svg, to convert these SVG images to PNG format, we can use the sharp package.
To use Satori for generating OpenGraph images, we need to create a template in JSX-like format. It’s important to note that not all JSX features are supported, and some React APIs and CSS are not available. For more information on supported features, you can refer to the Satori documentation. Here an example of what template I am using in this blog look like
export interface OgData {
  title: string;
  date: Date;
}

const Template = (props: OgData) => (
  <div
    style={{
      height: "100%",
      width: "100%",
      display: "flex",
      backgroundColor: "white",
      backgroundImage:
        "radial-gradient(circle at 25px 25px, lightgray 2%, transparent 0%), radial-gradient(circle at 75px 75px, lightgray 2%, transparent 0%)",
      backgroundSize: "100px 100px",
      fontFamily: "JetBrainsMono-Bold",
    }}
  >
    <div
      style={{
        padding: "20px",
        display: "flex",
        width: "100%",
        height: "100%",
        justifyContent: "center",
        alignItem: "stretch",
      }}
    >
      <div
        style={{
          display: "flex",
          flexDirection: "column",
          justifyContent: "space-between",
          border: "1px solid #374151",
          boxShadow: "5px 5px 0px #374151",
          width: "100%",
          height: "100%",
          padding: "10px",
        }}
      >
        <div
          style={{
            fontSize: "32px",
            fontWeight: "900",
            lineHeight: "3rem",
            padding: "10px 0 50px 0",
            color: "#374151",
            flex: 1,
            display: "flex",
            fontFamily: "PlusJakartaSans",
          }}
        >
          {props.title}
        </div>
        <div
          style={{
            fontSize: "16px",
            fontWeight: "900",
            color: "#374151",
            display: "flex",
            flexDirection: "row",
            justifyContent: "space-between",
            alignItems: "center",
          }}
        >
          <div>
            {props.date.toLocaleDateString("en-US", {
              year: "numeric",
              month: "long",
              day: "numeric",
            })}
          </div>
          <div style={{ display: "flex", alignItems: "center" }}>
            <span style={{ marginRight: "16px" }}>Jafar Aziz</span>
          </div>
        </div>
      </div>
    </div>
  </div>
);
This template takes two props, “title” and “date”, and generates an image similar to the example shown.
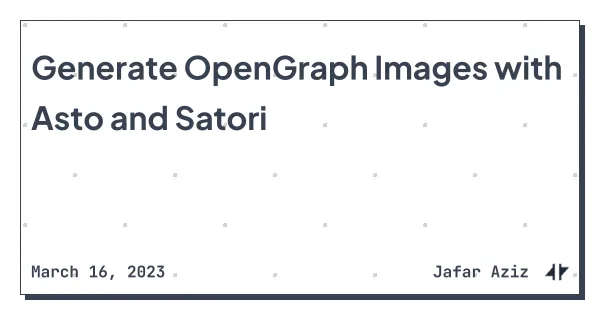
Next, we need to create a function that generates an SVG from the template using Satori options such as fonts, image size, and others. Once the SVG has been generated, we can convert it to a buffer using the Sharp package. With sharp, buffer from svg will became a png.
import sharp from "sharp";
import { readFile } from "node:fs/promises";
import satori, { type SatoriOptions } from "satori";

const generateOgImage = async (
  text: string = "Default Title",
  date: Date = new Date()
): Promise<Buffer> => {
  const options: SatoriOptions = {
    width: 600,
    height: 315,
    embedFont: true,
    fonts: [
      {
        name: "JetBrainsMono",
        data: await readFile("./src/assets/font/JetBrainsMono-Bold.ttf"),
        weight: 600,
        style: "normal",
      },
      {
        name: "PlusJakartaSans",
        data: await readFile("./src/assets/font/PlusJakartaSans-Bold.ttf"),
        weight: 900,
        style: "normal",
      },
    ],
  };

  const svg = await satori(
    Template({
      title: text,
      date: date,
    }),
    options
  );

  const sharpSvg = Buffer.from(svg);

  const buffer = await sharp(sharpSvg).toBuffer();

  return buffer;
};
Next, add a new route /open-graph/[...slug].png to our astro website by creating ./src/pages/open-graph/[...slug].png.ts file, and add this following code
import { getLatestPosts } from "@utils/blog";
import generateOgImage, { type OgData } from "@utils/openGraph";
import type { APIRoute, GetStaticPaths, GetStaticPathsItem } from "astro";

export const getStaticPaths: GetStaticPaths = async () => {
  const result: GetStaticPathsItem[] = [];

  // blog
  const blogs = await getLatestPosts();

  blogs.forEach(blog =>
    result.push({
      params: { slug: `blog/${blog.slug}` },
      props: {
        title: blog.data.title,
        date: blog.data.date,
      },
    })
  );

  return result;
};

export const GET: APIRoute<OgData> = async ({ props }) => {
  const response = await generateOgImage(props.title, props.date);
  return new Response(response, {
    status: 200,
    headers: {
      "Content-Type": "image/png",
    },
  });
};
I’m not using server side rendering for my Astro Project, instead I am using static path and generating all of the OpenGraph images during the build process. In the get function, we simply return a response with our png buffer from generated OpenGraph images. In getStaticPaths function, we return all static paths to be generated with slug and props. For example, I am using the blogs collection, you can add any static path as long as it matches the GetStaticPathsItem type.
As we discussed earlier, if we have route something like /blog/lorem-ipsum, then the URL for the corresponding OpenGraph image will be /open-graph/blog/lorem-ipsum.png (e.g just add /open-graph/ before the route). Add the following code on top of your base astro layout.
export const getOgImagePath = (filename: string = "Default Value") => {
  if (filename.startsWith("/")) filename = filename.substring(1);

  if (filename.endsWith("/"))
    filename = filename.substring(0, filename.length - 1);

  if (filename === "") filename = "Default Value";

  return `./open-graph/${filename}.png`;
};

const ogImage = new URL(getOgImagePath(Astro.url.pathname), Astro.url.origin)
  .href;
Next add open-graph meta tags in your base layout inside <head></head> tag. We can use the ogImage variable we created earlier to specify the URL of the OpenGraph image, in the og:image and twitter:image meta tags. This will ensure that our meta tags will refer to the OpenGraph images url we created beforem, and when our content is shared on social media platforms, the correct image is displayed.
<!-- Open Graph / Facebook -->
<meta property="og:title" content="title..." />
<meta property="og:description" content="description..." />
<meta property="og:image" content="{ogImage}" />

<!-- Twitter -->
<meta name="twitter:card" content="summary_large_image" />
<meta name="twitter:site" content="@jfrAziz" />
<meta name="twitter:image" content="{ogImage}" />
<meta property="twitter:title" content="title...." />
<meta property="twitter:description" content="description...." />
Finally, after completing all the steps mentioned above, you should check each page to ensure the OpenGraph images are being generated correctly and working as expected. I am using Social Share Preview browser extension from Placid to check opengraph images in each pages to see how the content will appear when it is shared on social media platforms.